Monday, 30 November 2015

Deconstruction - Titles - Louise Hyam

For my deconstruction task I looked at the titles of slasher horror films so that i was able to use effective ideas to help think of the idea for the name of our film. When deconstructing the titles of the slasher horror films I looked out how effective they are and the impact upon the audience. I chose 5 film titles to look at.

The first film title I looked at was Halloween. Below is the film title page for it:


This title for this film is fictive because the word ''Halloween'' can be associated with spooky things. As it is associated with spookiness, horror and gore this is likely to have an effect on the audience. This could foreshadow the genre of a slasher horror. The effect that it will have on the audience is that it is just a one word title but it portrays parts of the theme that are going to come within the film. The use of just a one word title is also very effective because it is short and creates a quick impact upon them.

The second film I decided to look at the title was Nightmare on elm street.

The title of this film portrays the idea that something bad is going to happen within the film through the use of the word ''Nightmare'' this word is effective upon the audience because they are unsure what the nightmare will be within the film and this will make them want to watch it so that they could find out after seeing the title what it is about.
scream

The third slasher horror film that I looked at was Friday the 13th.


This title is effective because it relates to another horror related day in the year like halloween. This can also foreshadow the theme of horror excuse it is related to thad things that happen. This will be effective on the audience because it doesn't portray much about what is going to happen so this is effective upon making the audience want to watch it after seeing the title advertised.

The fourth film title I looked at for my deconstruction was Behind The Mask.

The film title ''Behind The Mask'' creates an uneasy effect on the audience straight away. It does this because the audience are unaware of what could be behind the mask. This title is effective because the effect it creates on the audience is an effect where they are unsure what the title means and they know that something may be behind the mask but they are unsure what, therefore this is an effective title because it will make them want to find out what is behind the mask. This title could also be fictive because it is very vague and gives little away about the film.

The last film that I chose when I deconstructed was Scream.

This film title is effective firstly because it is very short and snappy. The effectiveness of it being one word is that it doesn't give much away to the audience except about what the word says. The word ''scream'' suggest struggle and needing help, it suggests this because people usually scream when they are in trouble or in need of help. This therefore could portray from the title what may happen in the film.

Sunday, 29 November 2015

Practical Task - Costume

For my next practical task I created a Slasher Horror themed costume. I decided to make the top of a stabbed victim, which is also my groups' idea for our film opening.

To do this, I firstly found an old white top because it would be more effective in clearly showing the blood and dirt. I also collected some scissors, red paints and a paintbrush.


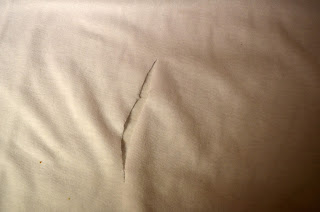
Next, I used the scissors to cut into the top - I created a big slice at the front of the top to show where a knife had sliced through, then created a few more smaller ones, and a fourth on the sleeve.


I then ripped some of the top by hand. I decided to do this to show rips and tears from where the victim probably tried to escape.


I then mixed the two red paints together to make a deep red blood colour. I used the paintbrush to firstly paint over the top, specifically over the cut areas to show the stabbing.


Secondly, I hit the paintbrush to splash red paint over the top to effectively create a blood splattered effect.


Once the paint had dried, I took the top outside and draped it through mud to create a dirty look. This created the idea of the victim attempting to get away in a wooded area - which is the opening of our film.


This was my final product:


What went well?
I think that the splattered blood effect I created by splashing the red paint onto the top was really effective in creating a slasher costume. I also think that the use of mud and dirt on the top successfully made a more realistic look, and is ideal for our film opening.

What would I improve?
I think that using a thicker top would have been more effective in showing the tears, slashes and paint splatter because the one I used was laced so already had holes. I also think that using fake blood would have made it look more realistic rather than mixing paints, because it looked too bright to be real blood.


Saturday, 28 November 2015

Deconstruction Task - Camera Angles

The film that I decided to deconstruct and look at the Camera Angles in was Friday the 13th (2009). This is the clip I used:


The clip began with an Establishing Shot of the location, showing the viewer that the character is in the woods. This immediately made the scene eerie as the character was alone in an isolated location in the dark making it tense and you aren't sure what is going to happen next.


The character is looking for a friend and spots something he has dropped. When he picks it up a close up shot of the item is shown which then pans to a close up of an ear hanging from the bush. This is effective as it shows the ear in detail and shocks the viewer and puts them on the edge of their seat as they do not know what happened and why.


The camera then quickly moves to another guy who is dead and has an ear missing. The camera focuses on him in a mid shot but it quickly zooms into his face creating a close up shot. This shows the characters wounds in detail, making it gory and adding suspense to the scene as they don't know who or what did it. 


The scene then jumps to a girl alone in at tent. The first shot is a close up of her face, showing her expression, indicating that she is worried and scared. The scene then changes to a mid shot and tilts upwards as a shadow of a man holding a knife appears on the tent behind her. This creates tension as it works well with the sound also being played.


A long shot is then used as the male character runs back to the campsite and sees another of his friends hanging above a fire. The long shot is effective as it shows the viewer everything including the location and exactly what is happening making it easy to follow and understand. The long shot also creates tension as the friend is far away and in trouble and so needs to be helped as quick as possible. This scene is also done in a point of view shot as it is filmed handheld as the friend runs to help, making it jumpy and hard to focus on as he runs to help her, also adding tension to the scene.


As the character runs to help his friend he gets trapped in a bear trap. A close up shot is then used to show his leg and wounds as soon as it happens showing the blood and cuts to show its severity. This is effective as it creates further suspense and he is now no longer able to help his friend and they are both in trouble. Extreme close ups of both the males and females faces are then shown, showing their reactions and further indicating the amount of pain they're in as they scream.


An over the shoulder shot is then used as you see the male character try to free himself with the fire in the background as the girl also struggles to free herself. This creates suspense as the two are so close together but neither can be saved or help each other. Close up shots of the fire are also shown showing how dangerous and large it is, also building tension as the girl is still hanging above it and being burned.


The scene ends when the rope holding the girl snaps and she falls to the ground. A mid shot is then used to show her face and top half of her body and all the burns she has from being hung above the fire. This shows how injured she is and shocks the viewer as the killer is still loose.


Practical Task - Lighting Checks

For this Practical Task I decided to look into lighting. As we have decided the location for our film opening I felt it would be useful to scout the location a couple times at different times in the day. This would allow me to look at how light or dark it is and work out what the best time to film would be to ensure it looked dark and eerie when filming, but also ensure that everything was still easily visible in the images and videos.

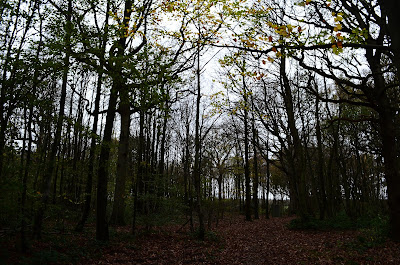
I visited the location twice at 10am and 3pm and compared the lighting in the images I took. Here are a few images from when I scouted the location at 10am.


When visiting the location at this time the lighting was very bright, making the woods feel very open but also creating lots of dark shadows in the woods, although these shadows would be effective when filming there wasn't enough to create the dark and eerie atmosphere needed for our film opening as the light shone through the trees and lit the woods very well. As we want our film opening to look as though it is set in the night we must film at a later time when it is slightly darker to make it look like dusk in our film opening, making this an unsuitable time to film our opening scene.

I then visited the location again at 3pm and took the following shots:


At this time the location was a lot darker and the light was very dull and low. This created an eerie and creepy atmosphere. This was further enhanced by the cloud cover which made the woods darker. I think that this would be a suitable time to film our opening scene as the lighting was low and dull creating the atmosphere we want in our opening scene but will still allow us to ensure that the filming is successful and that everything can easily be seen when watched back. If we wanted the atmosphere of the location to be slightly different then we could prepare to film slightly earlier or later than this time in order to get the lighting that we need and want when filming.

I feel that we should visit the location slightly earlier than 3pm as the light quickly fades and it becomes dark very quickly at the location. I feel that in order to film everything in one session then we would need to visit the woods at roughly 1pm. Although this may affect the lighting slightly, it will mean that we have more time to film our film opening and ensure that we get everything completed.

Monday, 23 November 2015

Deconstruction Task - Sound

I deconstructed the sound in a clip from the film Saw 1. This is the clip:


The clip begins with the faint sound of running water as someone's face appears, slightly lit by a small blue light floating in the water. As the title of the film appears a non-diegetic sound plays which it high pitched and eerie, made effective by the use of strings. Loud diegetic sound then begins as the person underwater struggles for breath and splashes around, this is further added to by the sound of the water going down the plug hole. This may cause the viewer to jump as the noise is sudden and louder than the running water beforehand.


As the character gets out of the water an echoing mechanical and electrical sound can be heard from above, creating suspense as the viewer and character are both unaware of what it is. The character then begins to shout for help and a second voice can later be heard. The voices sound echoed suggesting that they are in a large empty room, which is isolated and deserted. Suddenly there is a loud sparking sound which makes the viewer jump as the lights are turned on and loud bangs and sparks can be heard. As well as this an eerie non-diegetic sound can be heard playing building suspense as it goes on, this is further enhanced by the unfocused filming as the room cannot be seen completely, creating uneasiness in the viewer as they don't know where they are,


As the room focuses the sound fades and then suddenly becomes loud and creepy, creating suspense and worry as the viewer is unaware of what is happening. The camera suddenly tilts to a man laying dead on the floor and the non-diegetic sound gets louder and high pitched to the point where it sounds like a scream. This makes the scene tense and builds suspense as the soundtrack builds as the man is revealed. There is also a lot of loud beats as the camera shots jump to show different parts of the man on the floor creating worry and uneasiness in the viewer as they try to work out what has happened.


This is again followed by a non-diegetic soundtrack created by the use of high pitched strings making it sound eerie and creepy creating tension in the scene, this further builds with the use of sudden notes being played on a piano or organ as the scene builds. As well as this there is a lot of diegetic sounds of chains being rattled and one of the victims screaming and shouting as he tries to free himself.


Practical Task - Costumes

For my practical task I decided to create a t-shirt which we plan to use in our coursework opening scene. I decided to create a t-shirt covered in blood and mud to make it look old and worn and to show that the person wearing it has been stabbed and injured.

Step 1:
I began by cutting a few holes into the t-shirt which is where the person would've been stabbed and cut. I made sure that they were big so that the wounds looked serious and painful.


Step 2:
I then added fake blood around the cuts in the shirt. I made sure that the blood was darker where the material was ripped and lighter at the edges to add effect. I also made sure that it was random and messy and that there was a lot of blood in order to make sure that it looked as realistic as possible.


Step 3:
I then sprinkled and smudged cocoa powder into the t-shirt to make it look dirty and muddy to suggest that the person had been wearing it a while or that she had struggled when she was killed. This made the t-shirt look a lot older and ragged and make it look like it was worn during the attack.


Step 4:
I then splattered more blood onto the t-shirt randomly, creating blood stains which will help to suggest that the girl was attacked with a lot of force. This also made the t-shirt a lot more effective and realistic as it added to the t-shirt by making it look dirtier and ruined.


This is the final product:


What went well?:
I feel that this practical task went well as the blood looked dark and realistic and the use of the cocoa powder was successful as it made the t-shirt look a lot more ruined and uneven. I also like the blood splatters as it added to the t-shirt by making it look like the stab wounds were applied with force.

What could be improved?:
To improve this I feel that I could've added a few more smaller cuts and rips in the t-shirt to make it look more ruined and add a few more wounds to the person. For example, by ripping one of the arms significantly and making it very obviously ruined so that the attack looked more serious.